Food and Garden Dailies started as a way to record my family's favorite recipes. It has come in handy many times when I'm asked for a recipe. I simply email a link to the blog! But I couldn't just stick to recipes. The kitchen is tied to the garden in so many ways...and so I let you into my ever changing garden as well.

If you're interested in my all-time favorite recipes, check out this post first: My Favorite Recipes

Tuesday, April 5, 2011

Easy Meat Lasagna with Hearty Tomato-Meat Sauce

Pin It
While lasagna is pretty darn simple to make, it seems mine always were just so-so.  It was a meal I made without a recipe (one of the few) but it wasn't anything special.  So, wanting a knock-your-socks-off lasagna, I turned to Cook's Illustrated.  As usual, they've figured out how to do it right.  This was DELICIOUS. 

Easy Meat Lasagna with Hearty Tomato-Meat Sauce
(Cook's Illustrated)

Meat Sauce

In a dutch oven (I use a 5 qt. one for a single batch, or a 7 qt. one for a double), heat up:
     1 TB olive oil

Add and stir until softened (about 2 minutes):
     1 finely chopped medium onion

Add and stir until fragrant (about 30 seconds):
     6 minced medium garlic cloves

Add, stir, and cook about 4 minutes:
     1 pound mixture of ground beef, pork, or veal (I used 1/2 lb. ground beef and 1/2 pound     ground pork)
     1/2 tsp salt
     1/2 tsp pepper

Add, stir,  and bring to a simmer:
     1/4 C heavy cream
Cook until the liquid evaporates and just the fat is left (about 4 minutes).

Add, stir, and cook for about 3 more minutes:
     1 28 oz can tomato puree
     1 28 oz can diced tomatoes, drained

Set sauce aside.

Cheeses

Get out 1 small bowl, 1 medium bowl, and 1 large bowl.

Fill the small bowl with:
     1/4 C grated Parmesan cheese

Fill the medium bowl with:
     1 lb. shredded Mozzarella cheese

Fill the large bowl with:
     1 C grated Parmesan cheese
     15 oz whole-milk or part-skim ricotta cheese (I used part-skim)
     1 slightly beaten egg
     1/2 C chopped fresh basil
     1/2 tsp salt
     1/2 tsp pepper
Mix together until creamy. 

Have on hand:
     12 no-boil lasagna noodles from an 8 or 9 oz pack (I used Ronzoni brand)

Assemble Lasagna

Preheat oven to 375 degrees.

Spread 1/4 C of the meat sauce over the bottom of a 9 x 13" baking dish.

Place 3 of the noodles on top of the sauce for the first layer.  Spread  blobs of ricotta cheese mixture across the noodles (about 3-4 TB per noodle).  Sprinkle some mozzarella on top of the ricotta (about 1 1/3 C per layer).    Spoon 1 1/2 C of the meat sauce over the cheeses, spreading evenly.

Repeat the layering process.  On top of the last three noodles, spread any remaining sauce, sprinkle with 1 1/3 C mozzarella, and then top with the 1/4 C of Parmesan in the small bowl.

Lightly spray a piece of foil with cooking spray and cover.

Cook, covered, for 15 minutes.  Remove foil, and continue cooking for about 25 minutes, until the cheese is a spotty brown and the sauce is bubbling. 

Cool for 10 minutes before serving.

Freezing:  This freezes well.   Line your baking dish with foil, and prepare the lasagna.  Freeze the baking dish until the lasagna is frozen solid (overnight is great).  Remove the foil "package" from the dish, and wrap in heavy duty foil or vacuum pack with a FoodSaver.    To re-heat, remove the lasagna from the extra foil or the FoodSaver bag.  Place it back in the 9 x 13" pan and allow to defrost.    Follow the cooking directions above.

Monday, March 28, 2011

Project Simplify Week 4: Cleaning out the Pantry and Fridge

Pin It For the past few weeks I've been participating in an on-line challenge.  It's from Simple Mom and we're just starting week 4.  Each Monday, for five weeks, a challenge is announced This week's challenge is to clean out the fridge and pantry.  Past weeks' challenges have been cleaning out closets and dressers, getting control of the paper clutter, and organizing kids' toys and clothing.

Every Monday I enjoy getting on-line to check out the new challenge.  Most folks are putting their before/after pics and stories on their blogs.  Since this challenge is directly related to the kitchen, I'll post this week's results as well.

We have two refrigerator/freezers and one upright freezer.  And a pantry.  Thankfully my upright freezer is brand-spanking new and organized to the hilt.  Same with the top freezer space in the garage.  The outside fridge needs some major wipe downs.  It does get neglected.  I thought the inside fridge was in pretty good shape.  Oh, no.  I was dreadfully wrong.  Lots of gunk stuck to the shelves.  Outdated dressings.  A few leftover containers past their prime.  And then...the dusty guk behind the vent.  Oh, my.

My pantry is in decent shape.  But I've strayed from putting my dry goods in Tupperware Modular Mates containers lately.  I've been meaning to get back on track with that, so I'm thankful for the challenge.  I will be the first to admit I'm a bit compulsive about sealing all my cereals and snacks and flour, etc. in Tupperware.  But...it has saved me a ton of $$ when we've had critter infestations.  Yeah, that's the stuff no one wants to talk about.  But as clean as our kitchen is, we've been attacked by some sort of weird bug that multiplied (South Carolina), ants (South Carolina and Oregon), and mice (Oregon).  The first time we threw out hundreds of dollars of food because of bugs.  When Tupperware had a 50% off sale on Modular Mates I became a consultant and bought a bunch!

Anyhow...back to the challenge.   Here are my before pics.  I DID get my kitchen freezer/fridge completed so I have some after shots as well.  I'll post more as I progress with the challenge.

Want to join in?  Start this week with the fridge/freezer and pantry.  Then check in next Monday to see the final challenge.
Kitchen Freezer:


Kitchen Fridge Door:
(Look!  All the mustards are together! Salad dressings too!)

Kitchen Fridge:
(I know it looks a bit sparse!  I purposely chose to do this task before a big grocery trip.)
 

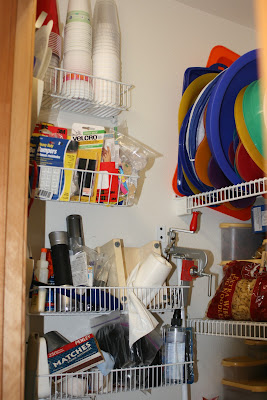
Left Wall of Pantry:
(All before)


 Pantry Shelves (Before):


Pantry Shelves (After Pics):  COMING SOON!

Thursday, March 24, 2011

Creamy Baked Four-Cheese Pasta

Pin It
It's no secret that I'm a huge fan of Cook's Illustrated.  My husband is a fan of pasta and cheese.  I mean, what's not to like?  On one of my busy nights, he took control of shopping and dinner and treated the family to this cheesy pasta dish.  Definitely a crowd pleaser!!  And, oh, so simple. 

Creamy Baked Four-Cheese Pasta
(Cook's Illustrated)

Topping

In a food processor, process with the steel blade until coursely ground:
     4 slices white sandwich bread, torn up
     2 TB melted unsalted butter

Toss with
     1/4 C grated Parmesan cheese

Set aside.

Pasta and Cheese

Heat the oven to 500 degrees.

Cook until al dente:
     1 lb penne pasta
When finished, drain, return to poss and toss with:
     1 TB olive oil

Melt:
     2 tsp unsalted butter

Add to the butter, stirring until golden, about a minute
     2 tsp all-purpose flour

Whisk in and bring to a simmer:
     2 C heavy cream
Whisk frequently until it's thickened.

Remove from heat and add:
     1/4 tsp salt
     1/4 tsp pepper
Cover to keep warm.

Combine in a large bowl:
     4 oz shredded fontina cheese (about 1 1/3 C)
     3 oz crumbled Gorgonzola cheese (about 3/4 C)
     1 oz grated Pecorino Romano cheese  (about 1/2 C)
     1/2 oz grated Parmesan cheese (about 1/4 C)

Add the cooked pasta to the cheese and pour in the hot creamy mixture.  Cover and let sit for three minutes.  Remove cover and mix until the cheeses are melted and all ingredients are combined.  Place in a 9 x 13" baking dish, and sprinkle with the bread topping.  Bake until the topping is golden brown, about 5-10 minutes.  Serve immediately.

Variations:

1)  Add a  14.5 oz. can of drained, diced tomatoes to the pasta when you add the creamy mixture.    Add 1/4 C chopped fresh basil just before you put it in the baking dish.

2)  Skip the salt and instead add 4 oz chopped prosciutto and 1 C frozen peas to the pasta when you add the creamy mixture.

Tuesday, March 22, 2011

Chicken Cordon Bleu

Pin It
A few years ago I purchased the cookbook, Don't Panic- Dinner's in the Freezer, which had some pretty decent reviews.  I liked the variety of the recipes as well as the format.  The recipe page features a simple chart for a single batch, x3, x6, or x9....perfect for large batch cooking.  Not too long ago, a companion book came out, Don't Panic-  More Dinner's in the Freezer.  Some good reviews led me to purchase that as well.  (I know, I know....there are too many cookbooks to begin with in our home!!).  This book's been sitting up on the shelf, getting ignored as I pass it by for Cook's Illustrated recipes.  Poor thing!  A few weeks ago, I dusted it off and tried the first recipe.

The Chicken Cordon Bleu was pretty darn good.  Simple flavors, easy to make. 

Chicken Cordon Bleu
(Don't Panic-  More Dinner's in the Freezer)

Yield:  4 servings

Fill one shallow bowl/dish with:
      1/2 C flour
     1 TB paprika

Fill one shallow bowl/dish with:
     1 beaten egg

Fill one shallow bowl/dish with:
     1/2 C plain breadcrumbs (fresh or dried would both work)

Pound to uniform thickness, about 1/4" thick*
     4 large boneless, skinless chicken breast halves

Top each breast with
     1-2 slices of ham
     2 thin slices of Swiss cheese
     A dollop of the Bechamel sauce**

Roll up each chicken breast, and secure with a toothpick.  Dip the chicken piece in the flour, then the egg, and then the breadcrumbs, rolling each time to cover completely.

Heat a skillet with a bit of oil and brown all sides of the chicken.  Place browned chicken on a baking sheet.  Flash freeze. Once frozen solid,  freeze individual or family sized servings in a freezer bag, removing as much air as possible.  Or vacuum pack, which is my preferred method.

To serve:  Completely defrost chicken.   Bake in a 375 degree oven until done (25-30 min.).   Pour thawed Bechamel sauce* over chicken for the last 5 minutes of cooking.

*You can pound the breasts and make pretty little spirals, or you can take a shortcut like I did.  Make a slit inside the chicken breast and fill with the cheese, ham, and sauce.  Works just fine!

You can see how the sauce on top is a bit grainy.  Make that fresh instead!
**The Bechamel sauce is supposed to be made ahead.  Some of it goes into the chicken, and the rest is divided into little baggies, frozen, and defrosted to pour over the chicken at the end of the end of the cooking cycle.  The milk-based sauce doesn't freeze very well.  It takes on a lumpy, grainy texture once frozen.  It still adds flavor, and I'd rather make it with the frozen sauce than without.  

The consistency of the sauce that's placed inside the chicken  isn't as noticeable as the sauce poured on top.  I would continue to make some sauce ahead, and place it inside the chicken.  Then I'd also make up a bit of this sauce on eating day and not freeze it.  I always have butter, milk, and flour on hand.  I don't always have Swiss cheese though.  So the next time I make this, I'll put a bit of Swiss in a baggie, pack it with the chicken, and add fresh sauce on top.

Wednesday, March 16, 2011

Lentil-Barley Burgers

Pin It
Since the girl declared herself a vegetarian 4 years ago, we've been on the hunt for flavorful, kid-friendly vegetarian recipes.  It's so easy to just pop a frozen chik patty or a veggie burger in the toaster oven, and at times we do rely on them.  But my goal is to have a variety of healthy, home-made, frozen vegetarian foods on hand for the girl's meals.  This lentil-barley burger is perfect!

Lentil-Barley Burgers
(Cooking Light)

Use leftover cooked pearl barley with lentils, veggies, and seasonings for a hearty main-dish burger sans the bun. Fruit salsa adds bright flavors. Serve with lime wedges for added zest.
Total: 2 hours
Yield: 4 servings (serving size: 2 patties and 1/4 cup salsa)

Ingredients

  • 1 1/2  cups  water
  • 1/2  cup  dried lentils
  • Cooking spray
  • 1  cup  chopped onion
  • 1/4  cup  grated carrot
  • 2  teaspoons  minced garlic
  • 2  tablespoons  tomato paste
  • 1 1/2  teaspoons  ground cumin
  • 3/4  teaspoon  dried oregano
  • 1/2  teaspoon  chili powder
  • 3/4  teaspoon  salt, divided
  • 3/4  cup  cooked pearl barley
  • 1/2  cup  panko (Japanese breadcrumbs)
  • 1/4  cup  finely chopped fresh parsley
  • 1/2  teaspoon  coarsely ground black pepper
  • 2  large egg whites
  • 1  large egg
  • 3  tablespoons  canola oil, divided

1. To prepare burgers, combine 1 1/2 cups water and lentils in a saucepan; bring to a boil. Cover, reduce heat, and simmer 25 minutes or until lentils are tender. Drain. Place half of lentils in a large bowl. Place remaining lentils in a food processor; process until smooth. Add processed lentils to whole lentils in bowl.

2. Heat a large nonstick skillet over medium-high heat. Coat pan with cooking spray. Add onion and carrot; sauté 6 minutes or until tender, stirring occasionally. Add garlic; cook 1 minute, stirring constantly. Add tomato paste, cumin, oregano, chili powder, and 1/4 teaspoon salt; cook 1 minute, stirring constantly. Add onion mixture to lentils. Add remaining 1/2 teaspoon salt, barley, and next 5 ingredients (through egg); stir well. Cover and refrigerate 1 hour or until firm.

3. Divide mixture into 8 portions, shaping each into a 1/2-inch-thick patty. Heat 1 1/2 tablespoons oil in a large nonstick skillet over medium-high heat. Add 4 patties; cook 3 minutes on each side or until browned. Repeat procedure with remaining 1 1/2 tablespoons oil and 4 patties.

Cooking Light published a recipe for Fiery Fruit Salsa to serve with the burgers.  Here's that recipe as well:

Fiery Fruit Salsa
(Cooking Light)

Mis together, cover, and refrigerate:
  • 1/4  cup  finely chopped pineapple
  • 1/4  cup  finely chopped mango
  • 1/4  cup  finely chopped tomatillo
  • 1/4  cup  halved grape tomatoes
  • 1  tablespoon  fresh lime juice
  • 1  serrano chile, minced

Nutritional Information :

Serving Size:  2 patties, 1/4 cup Salsa;  Calories: 315;  Fat:  12.8g (sat 1.2g,mono 6.8g,poly 3.5g);  Protein:  12.8g:  Carbohydrate:  39.2g;  Fiber:  9.5g;  Cholesterol:  53mg;  Iron:  3.9mg;  Sodium:  539mg;  Calcium:  60mg

Tuesday, March 15, 2011

How to Get Rid of Fruit Flies

Pin It
I really don't want or need to know where fruit flies come from.  They just magically materialize when fruit starts to rot.  They multiply like rabbits. Actually, I think they multiply faster than rabbits.  To get rid of them, you really have to stay on top of them and not let them get out of control.

When I first spy one, I quickly check my produce bowl.  Usually I just have to tap it, and a fruit fly or two (hopefully that's all....) will fly out.

Over the years I've tried different methods to get rid of them.  Slapping them together between two damp pieces of paper towel was the most fun and actually pretty darn effective.  It did take some time though, and I'm sure I looked quite foolish.

So when the last bout of fruit flies began, I started Googling to find out easier ways to get rid of them.  There's a lot of information out there.  Capturing them in a container with bait is a common theme.  But do you just poke holes in the container lid or do you make a cone-shaped funnel for them to enter?  Do you put rotting fruit, juice, apple cider vinegar, dish soap,  balsamic vinegar, or white wine and coriander seeds in the container as bait?  Do you suck them up with a vacuum cleaner attachment?

I tried a few things and quickly learned that more flies go to the cone-shaped funnel than to a random hole poked in a lid.

Going back to my science fair days, I set out three jars fitted with cone-shaped funnels.  One had a rotten piece of fruit, one had apple cider vinegar (seemed to be recommended most), and one had the fruit and the vinegar.   I placed the jars right near the source...the fruit bowl.

Those little bugger found my jars pretty darn quickly.  The most effective jar was the one with plain old apple-cider vinegar.  It caught twice as many flies as the other jars.  And it looked a whole lot better!  So, if you're looking to get rid of fruit flies, get a jar, a coffee filter, some tape, apple-cider vinegar, and a pokey-stick.


Fold the filter in quarters.

Put a few inches of apple cider vinegar in the jar.
Place the coffee filter in the jar, as shown.
With the cone inside, fold the top of the filter over the edge of the jar.  Tape in place, and poke a hole at the bottom of the cone.

Place the jar near your food source and wait for the fruit flies.  Change out the jars each day.  It's kinda' icky looking at floating fruit flies.  

Monday, March 14, 2011

Key Lime Pie with Meringue Topping

Pin It

Today is 3.14.  Pi Day.  Or Pie Day.   How will you be celebrating?  In honor of Pi Day, here's one you might like to try:  some good ol' southern Key Lime Pie.

Before we get to the recipe, we'll be taking a brief detour through the Low Country of South Carolina.  While living in the Low Country,  we were introduced to many regional foods, events,  and customs.

One of my first memories was when we'd just moved there.  My neighbor, Teresa, invited me to go with her to the Loris Bog Off.  Now Loris  is this dinky little town in Horry (that's OH-reeeee) County with about 2,000 residents.  Once a year, the town swells to 30,000 with its annual festival featuring chicken bog.  For those of you not in the know, a Bog-Off is much like a Chili Cook-Off.  Chefs prepare their own unique recipes of chicken bog and enter it in a contest.

I'd never heard of chicken bog until I moved to South Carolina.  And, like chili, there are umpteen recipes and variations.  The basics are rice (staying true to the low-country's heritage), sausage, chicken, onions, and broth.  The dish is as local as you can get. And Loris is as famous as Loris will ever be with the annual Bog-off.

Anyhow, as we're wandering around the streets of Loris I saw this group of men in suits with an old man who was going around shaking hands with everyone.  He made his way to Teresa and me, and shook our hands too.  As he walked away I learned I just shook hands with the country's oldest and longest serving US Senator:  Strom Thurmond.  He was 94 years old and campaigning for his last election.

During our five years in the Low Country, we also had the opportunity to try benne wafers, boiled peanuts, greens, grits (instant not allowed), she-crab soup, chitlins (thankyouverymuchbutiwillpassonthese),barbecue (simply called barbecue, it's vinegar-based barbecued pork) , and of course, fried chicken smothered with gravy (OK...everything was smothered in gravy!).  Coming from the west, this was a whole new world of food.

And how do you properly top off a Low Country meal?  Key Lime pie, of course!  It's another regional favorite, though not strictly Low-Country.  Oh, my.   The Southerners do know their pie!

So, in honor of Pi Day, I will share with you Paula Deen's Key-Lime Pie with Meringue Topping.

Key Lime Pie with Meringue Topping
(Paula Deen)

Pie:

1 prepared 9-inch graham cracker crust (I used Keebler brand)
1/2 C heavy cream
1/2 C freshly squeezed lime juice
2 tsp grated lime zest
1 (14-ounce) can sweetened condensed milk
3 large egg yolks

Meringue:
4 egg whites
6 TB sugar
1/2 tsp cornstarch
pinch of salt

Preheat the oven to 350 degrees.
In a medium bowl, whisk together the egg yolks and condensed milk. Stir in the lime zest, lime juice, and cream. Pour the filling into the crust and bake about 30 minutes or until firm. Remove pie from oven.
Meanwhile, in a medium bowl beat the egg whites until soft peaks form. In a second bowl, stir together the sugar, cornstarch, and salt. Add the sugar mixture, a little at a time, to the egg whites, beating between additions. Continue to beat until the sugar dissolves. Spoon the meringue over the hot pie filling. Torch the meringue to give it’s golden color; or bake for 10 to 12 minutes. Serve pie warm or at room temperature. 
 
 And, just to be clear, as Paula Deen states, "Key Lime Pie should never be green!"