
This is an
update (updated 11/7/11) to my plan that I created several years ago.
It's one I'll probably post each November.
Are you looking for some new Thanksgiving recipes? With Thanksgiving
approaching I thought I'd share my Holiday Meal Plan with all of my (tens
of???) readers. My hope is that it will help your stress levels if you are
preparing Thanksgiving dinner and all the trimmings for family or friends.
These holiday recipes are our family's traditional dishes. Sometimes there's a
different vegetable or bread, but we pretty much serve the save thing for
Thanksgiving or Christmas. It might sound boring, but considering we only have
this once or twice a year, it is a meal we look forward to!
The
Menu:
Thanksgiving
morning: Apple Streusel Coffeecake
Thanksgiving
Dinner: Turkey, Gravy, Mashed Potatoes, Cornbread, Broccoli with Garlic Butter
and Cashews, Green Beans with Pecans, Smoky Scalloped Potatoes, Sausage
Stuffing
Dessert: Apple
Pie
Day After
Thanksgiving: Day After Thanksgiving Turkey Pot Pie
(I can never
decide between mashed potatoes (easy!) and the scalloped potatoes
(scrumptious!), so they're both listed. I don't usually make both, unless
it's a really large crowd.
The
following plan will easily feed 10-12 people with some leftovers. For
additional people, add another vegetable dish.
Make
sure to have on hand:
- dried sage
- dried thyme
- olive oil
- dried rosemary
- bay leaves
- ground marjoram
- cayenne pepper
- dry mustard
- salt
- black pepper
- cinnamon
- apple pie spice
- fresh thyme (1 TB)
- butter, salted
- butter, unsalted
- vegetable shortening
- sugar
- flour
- cornmeal
- light brown sugar
- baking powder
- baking soda
- canola oil
- milk
- soy sauce
- white wine vinegar
- garlic
- vanilla
- eggs (4)
Shopping
List:
- salted cashews (1/3 C)
- shelled walnuts (1 C)
- pecan halves (1 C)
- plain low fat yogurt (16
oz)
- Granny Smith apples (6)
- broccoli (1 1/2 pounds)
- celery (1 C)
- onion (2 large)
- fresh parsley (1/2 C)
- 5-10 lbs. baking
potatoes (5 pounds if making just one of the potato dishes; 10 pounds if
making both)
- 2 pie crust shells (As a
shortcut you can use Pilsbury refrigerated pie crust, or you can make your
own)
- chicken broth (2 cans)
- ground sausage (1 lb)
- herb seasoned stuffing
mix (8 oz) (or a loaf of bread to make your own)
- turkey
- 1/4-1/2 pound ground soy
“sausage”
- 2 C smoked Gouda cheese
- heavy cream (1 1/2 C)
- buttermilk (1 1/2 C)
UP
TO A WEEK BEFORE
CHOP
1 cup celery
1 cup onion
1/4 cup parsley
Place all 3 in
a baggie for Stuffing.
1 large onion
Place in a
baggie for Scalloped Potatoes
1 cup celery
1 cup onion
Place both in a
baggie for Turkey Potpie.
1 ½ pounds
broccoli, in bite sized pieces
Put in baggie
for Broccoli dish.
3-4 cloves
garlic (whole...don’t chop)
Place in a tiny
prep container for Mashed Potatoes.
1 cup walnuts
Put in prep
bowl for Coffee Cake.
1/3 cup salted
cashews
Put in baggie
for Broccoli Dish
2 pounds fresh
green beans, wash and trim ends
Put in baggie
for Green Bean Dish.
4 TB shallots
Put in small
prep bowl for Green Bean Dish
3 TB fresh
parsley
Put in small
prep bowl for Green Bean Dish
SHRED
2 C smoked
Gouda cheese
Place in baggie
for Scalloped Potatoes
DAY
BEFORE
COOK
1 pound ground
Italian sausage
1/4-1/2 pound
ground soy “sausage” (My daughter is vegetarian...so I make some of the
stuffing with her "sausage".)
Put in separate
baggies for Stuffing
CHOP
6 cups Granny
Smith apples (pie)
2 Granny Smith
apples (coffee cake)
Keep apples in
a bowl of lemon juice and water, covered in the refrigerator until needed.
PREPARE
12 prep bowls
shown in the chart below (click on it to enlarge)
Apple Streusel
Coffeecake: Make the batter and keep it covered and refrigerated in the
Kitchen Aid mixing bowl. (Quickly beat it in the morning.)
Pie crusts (can
be placed on waxed paper and rolled up in the fridge until needed)

Smoky Scalloped
Potatoes: Prepare, cover with foil, refrigerate.
Clean and prep
turkey. Put the spice rub under the skin. Cover with foil and place in the
refrigerator. (For a detailed look at seasoning the turkey under the
skin, check out this post:
TURKEY SEASONING
UNDER THE SKIN)
The following
chart is the beauty and brains behind the simplicity of this meal. I set out 11
prep bowls (sizes are listed on the chart), and fill them assembly-line style
with different ingredients. Each bowl is numbered with masking tape so I know
when to use it. Once these bowls are filled, most of the work is done!
Ingredients to
get out for the assembly bowl line:
- dried sage
- dried thyme
- olive oil
- dried rosemary
- bay leaves
- ground marjoram
- salt
- black pepper
- cinnamon
- apple pie spices
- butter, salted
- butter, unsalted (2
sticks)
- vegetable shortening
- sugar
- flour
- cornmeal
- light brown sugar
- baking powder
- baking soda
- canola oil
- milk
- soy sauce
- white wine vinegar
- garlic
- fresh thyme
- cayenne pepper
- dry mustard
And now, for
the chart. If you click the photo below, the whole chart will be large
enough to view the details.
MORNING
OF
BAKE
Coffee Cake
350 degrees,
70-80 minutes (make sure center by cone is done)
PREPARE
Stuffing (can
keep warm in crock pot)
Use wok (small
or large burner)
Put turkey in
oven (see time chart).
JUST
BEFORE TURKEY IS DONE
COOK
Peel and boil a
few pounds of the potatoes w/garlic for mashed potatoes (You can skip this step
if the Scalloped Potatoes will be enough for your group.)
ASSEMBLE
AND PREPARE
Apple Pie
Cornbread
Take Scalloped
Potatoes out of the refrigerator.
ONCE
TURKEY IS OUT OF OVEN
PLACE
IN OVEN
425 degrees
Cornbread
Apple Pie
Scalloped
Potatoes
COOK
STOVETOP
Broccoli
w/Garlic Butter and Cashews (use large stock pot, then skillet on large burner)
Green Beans
with Pecans (use 3 qt. stock pot and steamer)
PREPARE
Gravy
Use medium pot
and small burner
Mash the
potatoes. Use KA mixer or potato masher. Mash with butter, milk, salt and
pepper to taste. Keep warm.
Carve turkey
after 20-30 minutes of cooling.
And
now, the recipes:
Broccoli
with Garlic Butter Cashews
1 1/2 pounds
fresh broccoli, cut into bite size pieces
1/3 cup butter
1 tablespoon
brown sugar
3 tablespoons
soy sauce
2 teaspoons
white vinegar
1/4 teaspoon
ground black pepper
2 cloves
garlic, minced
1/3 cup chopped
salted cashews
Place the
broccoli into a large pot with about 1 inch of water in the bottom. Bring to a
boil, and cook for 7 minutes, or until tender but still crisp. Drain, and
arrange broccoli on a serving platter.
While the
broccoli is cooking, melt the butter in a small skillet over medium heat. Mix
in the brown sugar, soy sauce, vinegar, pepper and garlic. Bring to a boil,
then remove from the heat. Mix in the cashews, and pour the sauce over the
broccoli. Serve immediately.*
*It really does
taste best when served immediately. When it's re-heated, the broccoli gets a
little too mushy. So, I recommend only cooking the amount of broccoli your
family will be eating at one sitting. You can reserve some of the marinade/cashews
for another day when youcan quickly steam some fresh broccoli.
Green
Beans with Pecans (San
Francisco Encore)
Prep ahead of
time:
-wash and trim
2 pounds of fresh green beans

-mince 4 TB of
shallots
-mince 3 TB of
fresh parsley
Steam until
just tender, but still firm:
2 pounds of
fresh green beans
In a skillet,
saute until softened:
3 TB butter
4 TB minced
shallots
Add, and brown
lightly:
1 C pecan
halves
Stir in:
beans
3 TB minced
fresh parsley
Toss to coat
and heat thoroughly. Season to taste with salt and pepper.
Cornbread
Preheat oven to
425 degrees. Grease 8 x 8 x 2" baking dish.

Mix together:
1 C sifted
flour
2 TB sugar
3 tsp baking
powder
½ tsp salt
1 C cornmeal
Make a
depression in the center of the dry ingredients and lightly beat:
1 egg
Add to the
center mixture:
1/4 C canola
oil
1 C milk
Stir dry and
wet ingredients together until the flour mixture is moistened.

Bake 20-25
minutes or until golden brown on top.
Turkey
Gravy
Pour off
drippings from roasting
pan.
Add to a pot:
3 TB drippings
Add, and stir
to make a paste:
3 TB flour
Gradually stir
in:
1 ½ C condensed
chicken broth, undiluted
½ tsp salt
1/8 tsp pepper
1 tsp coarsely
chopped fresh marjoram leaves OR
½ tsp dried
marjoram leaves

Bring to a
boil, stirring. Mixture will be thickened and smooth. Simmer, stirring, 1
minute
Makes 1 ½
cups.
Sausage
Stuffing
In large
skillet, saute:
1 lb sausage
Drain any fat
and add:
1 C chopped
celery
1 C chopped
onion
1/4 C chopped
parsley
Saute for 8-10
minutes.
In large stove
top pot, combine
1 pkg (8 oz)
herb-seasoned stuffing mix (or dried bread chunks from a good artisan bread)
½ tsp salt
1/4 tsp pepper
Toss to mix
well.
Add:
1 C chicken
broth
sausage mixture
Toss lightly.
Apple
Streusel Coffeecake
Streusel (In
bowl #3)

1 3/4 C packed
light brown sugar
3/4 C all
purpose flour
1 stick (1/2 C)
cold butter, cut in small pieces
2 tsp cinnamon
1 C walnuts,
coarsely chopped
In a medium
size bowl, stir everything (except the walnuts) together with fingertips until
crumbly and butter is completely incorporated. Stir in walnuts.
Cake (Dry
ingredients in bowl #4)
3 1/4 C all
purpose flour
1 ½ tsp baking
powder
3/4 tsp baking
soda
1 ½ sticks (3/4
C) butter or margarine (not spread), at room temperature
1 1/4 C sugar
3 large eggs

2 tsp vanilla
1- 16 oz
container plain low-fat yogurt
2 Granny Smith
apples, peeled, cored, and diced into ½” pieces (apples are in the
refrigerator, diced)
Mix flour,
baking powder, and baking soda in a small bowl. Beat butter and sugar in a
large bowl with electric mixer until fluffy, about 2 minutes. Beat in eggs one
at a time, beating well after each. Beat in vanilla and yogurt. With mixer on
low speed, beat in flour mixture.
Grease (and
flour) the Pampered Chef bundt pan EXTREMELY well with butter (not Pam) or
margarine.
Spoon 3 cups
batter into pan, spread evenly.
Sprinkle with
1/4 cup of the streusel, the apples, and then ½ cup of the streusel.
Spoon on
remaining batter and spread evenly, then add the nuts.
Sprinkle with
remaining streusel, pressing down lightly so it sticks to the batter.
Heat oven to
350 degrees. Bake 60-70 minutes or until a pick inserted in cake comes out
clean. Cool on wire rack 15 minutes. Place cookie sheet over pan and carefully
invert both. Remove pan and cool completely.
The most
“undone” part of the cake is in the middle around the cone.
Serves 16. Per
serving: 462 calories, 7 g pro, 63 g car, 21 g fat, 80 mg chol with butter, 41
mg chol with margarine, 291 mg sod. Exchanges: 2 1/4 starch/bread, 2 fruit, 4
fat.
Old
Fashioned Apple Pie

Preheat oven to
425 degrees.
Slice:
6 C tart apples
(Granny Smith/about 4 apples or 2 lbs)
Combine:
1 C sugar
1 tsp apple pie
spice*
1/4 C flour
dash salt
Add sliced
apples, lightly toss.
2 pie crust
shells (or make homemade crust listed below)
Fill one pie
crust and add the other on top. Seal edges and slit the top shell.
Bake 45-50
minutes or until the crust is golden brown.
The
Best Pie Dough (Cook's
Illustrated)
Double Crust
10-inch Regular or 9-inch Deep-Dish
When rolling
out the dough, roll to a thickness of about 1/8-inch thick (about the thickness
of two quarters).
For a
double-crust 10-inch regular pie
2 1/2 cups
unbleached all-purpose flour
1 teaspoon
table salt
2 tablespoons
granulated sugar
13 tablespoons
unsalted butter, cold, cut into 1/4-inch pieces
7 tablespoons
vegetable shortening, chilled
4 - 5
tablespoons ice water
1. Mix flour,
salt and sugar in food processor fitted with steel blade. Scatter butter pieces
over flour mixture, tossing to coat butter with some flour. cut butter into
flour with five 1-second pulses. Add shortening and continue cutting in until
flour is pale yellow and resembles coarse cornmeal with butter bits no larger
than small peas, about four more 1-second pulses. Turn mixture into medium
bowl.
2. Sprinkle 4
tablespoons of ice water over mixture. With blade of rubber spatula, use
folding motion to mix. Press down on dough with broad side of spatula until
dough sticks together, adding up to 1 tablespoon more ice water if dough will
not come together. Shape dough into two balls with your hands, one slightly
larger than the other. Flatten into 4-inch-wide disks. Dust lightly with flour,
wrap in plastic, and refrigerate for 30 minutes before rolling.
Time and
temperature: I started the pie out at 425 degrees. Once the crust was nicely
browned, I turned down the oven to 350 degrees. The result was
delicious! I didn't have to use the pesky torn foil pieces around the edge of
my pie (you know...to keep the edges from burning). Next time I might brush a
little water or egg over the raw upper crust and sprinkle on a dusting of
cinnamon and sugar.
A handy trick:
I had trouble lifting the bottom crust up and placing it in the pie pan. It
kept breaking apart. So, I rolled it out on a Tupperware pastry sheet I own,
set the pie pan (upside down) centered on the crust, and with the help of my
husband, carefully flipped the pan/crust/pastry sheet. The crust landed nice
and neat right in the pie pan!
Lumpy
Garlic Mashed Potatoes
Wash and scrub
15-20 potatoes.
You can peel
them, or leave the skins on. (I often peel about a third of them, as I like the
skins.
Cut potatoes
into fourths. )
Place into
large stockpots, filling with water (but not too much...or it will boil over).
Add a clove of
garlic into each pot of potatoes.
Boil until you
can pierce the largest potato chunk with a fork.

Drain the
potatoes.
Put the
potatoes back in the pot, or in a large bowl.
Add, to taste,
milk, salt, pepper, and butter.
Mash with a
potato masher.
Serve hot!
Turkey
* The USDA does
not recommend cooking turkey in an oven set lower than 325 degrees F.

* Place your
turkey or turkey breast on a rack in a shallow roasting pan.
* For optimum
safety, stuffing a turkey is not recommended. For more even cooking, it is
recommended you cook your stuffing outside the bird in a casserole. Use a food
thermometer to check the internal temperature of the stuffing. The stuffing
must reach a safe minimum internal temperature of 165 degrees F.
* If you choose
to stuff your turkey, the ingredients can be prepared ahead of time; however,
keep wet and dry ingredients separate. Chill all of the wet ingredients
(butter/margarine, cooked celery and onions, broth, etc.). Mix wet and dry
ingredients just before filling the turkey cavities. Fill the cavities loosely.
Cook the turkey immediately. Use a food thermometer to make sure the center of
the stuffing reaches a safe minimum internal temperature of 165 degrees F.
* A whole
turkey is safe when cooked to a minimum internal temperature of 165 degrees F
as measured with a food thermometer. Check the internal temperature in the
innermost part of the thigh and wing and the thickest part of the breast. For
reasons of personal preference, consumers may choose to cook turkey to higher
temperatures.
* If your
turkey has a "pop-up" temperature indicator, it is recommended that
you also check the internal temperature of the turkey in the innermost part of
the thigh and wing and the thickest part of the breast with a food thermometer.
The minimum internal temperature should reach 165 degrees F for safety.
* For quality,
let the turkey stand for 20 minutes before carving to allow juices to set. The
turkey will carve more easily.
* Remove all
stuffing from the turkey cavities.
Timetables
for Turkey Roasting
(325 degrees F
oven temperature)
These times are
approximate and should always be used in conjunction with a properly placed
thermometer.
Unstuffed
4 to 8 pounds
(breast) 1½ to 3¼ hours
8 to 12 pounds
2 3/4 to 3 hours
12 to 14 pounds
3 to 3 3/4 hours
14 to 18 pounds
3 3/4 to 4 1/4 hours
18 to 20 pounds
4 1/4 to 4 ½ hours
20 to 24 pounds
4 ½ to 5 hours
Stuffed
4 to 6 pounds
(breast) Not usually applicable
6 to 8 pounds
(breast) 2½ to 3½ hours
8 to 12 pounds
3 to 3 ½ hours
12 to 14 pounds
3 ½ to 4 hours
14 to 18 pounds
4 to 4 1/4 hours
18 to 20 pounds
4 1/4 to 4 3/4 hours
20 to 24 pounds
4 3/4 to 5 1/4 hours
-Tuck wing tips
under the shoulders of the bird for more even cooking. This is referred to as
"akimbo."
-Add ½ cup of
water to the bottom of the pan.
-If your
roasting pan does not have a lid, you may place a tent of heavy-duty aluminum
foil over the turkey for the first 1 to 1 ½ hours. This allows for maximum heat
circulation, keeps the turkey moist, and reduces oven splatter. To prevent
overbrowning, foil may also be placed over the turkey after it reaches the desired
color.
-If using an
oven-proof food thermometer, place it in the turkey at the start of the cooking
cycle. It will allow you to check the internal temperature of the turkey while
it is cooking. For turkey breasts, place thermometer in the thickest part. For
whole turkeys, place in the thickest part of the inner thigh. Once the thigh
has reached 165 degrees F, check the wing and the thickest part of the breast
to ensure the turkey has reached a safe minimum internal temperature of 165
degrees F throughout the product.
Day After
Thanksgiving Turkey Pot Pie
In a bowl,
combine:

1-2 C shredded/chopped turkey meat
1 C chopped
celery*1 C chopped onion*
1-2 C stuffing
1 C gravy
*You can saute
these in a little butter if you like. Sometimes I do, sometimes I don't!
Line a
pie pan (I swear by the Pampered Chef stoneware ones...they do not produce
soggy bottomed crusts!!) with one pie crust. Fill with the above contents.
Place a second pie crust over the top, sealing the edges. Decorate as desired.
(I used a turkey shaped cookie cutter to cut out all those
little turkeys around the edges. Just wet the bottom of the dough piece with a
little water so it will stick to the crust.) Put a few slits in the top crust
so steam can escape.
Bake at 375
degrees for 30-40 minutes (until the crust is golden).
Let the pot pie
cool and set for about 15 minutes before cutting into it.
For the
crust...I use the same crust recipe that was used for the apple pie. So, if
you're making crusts, just double that recipe.
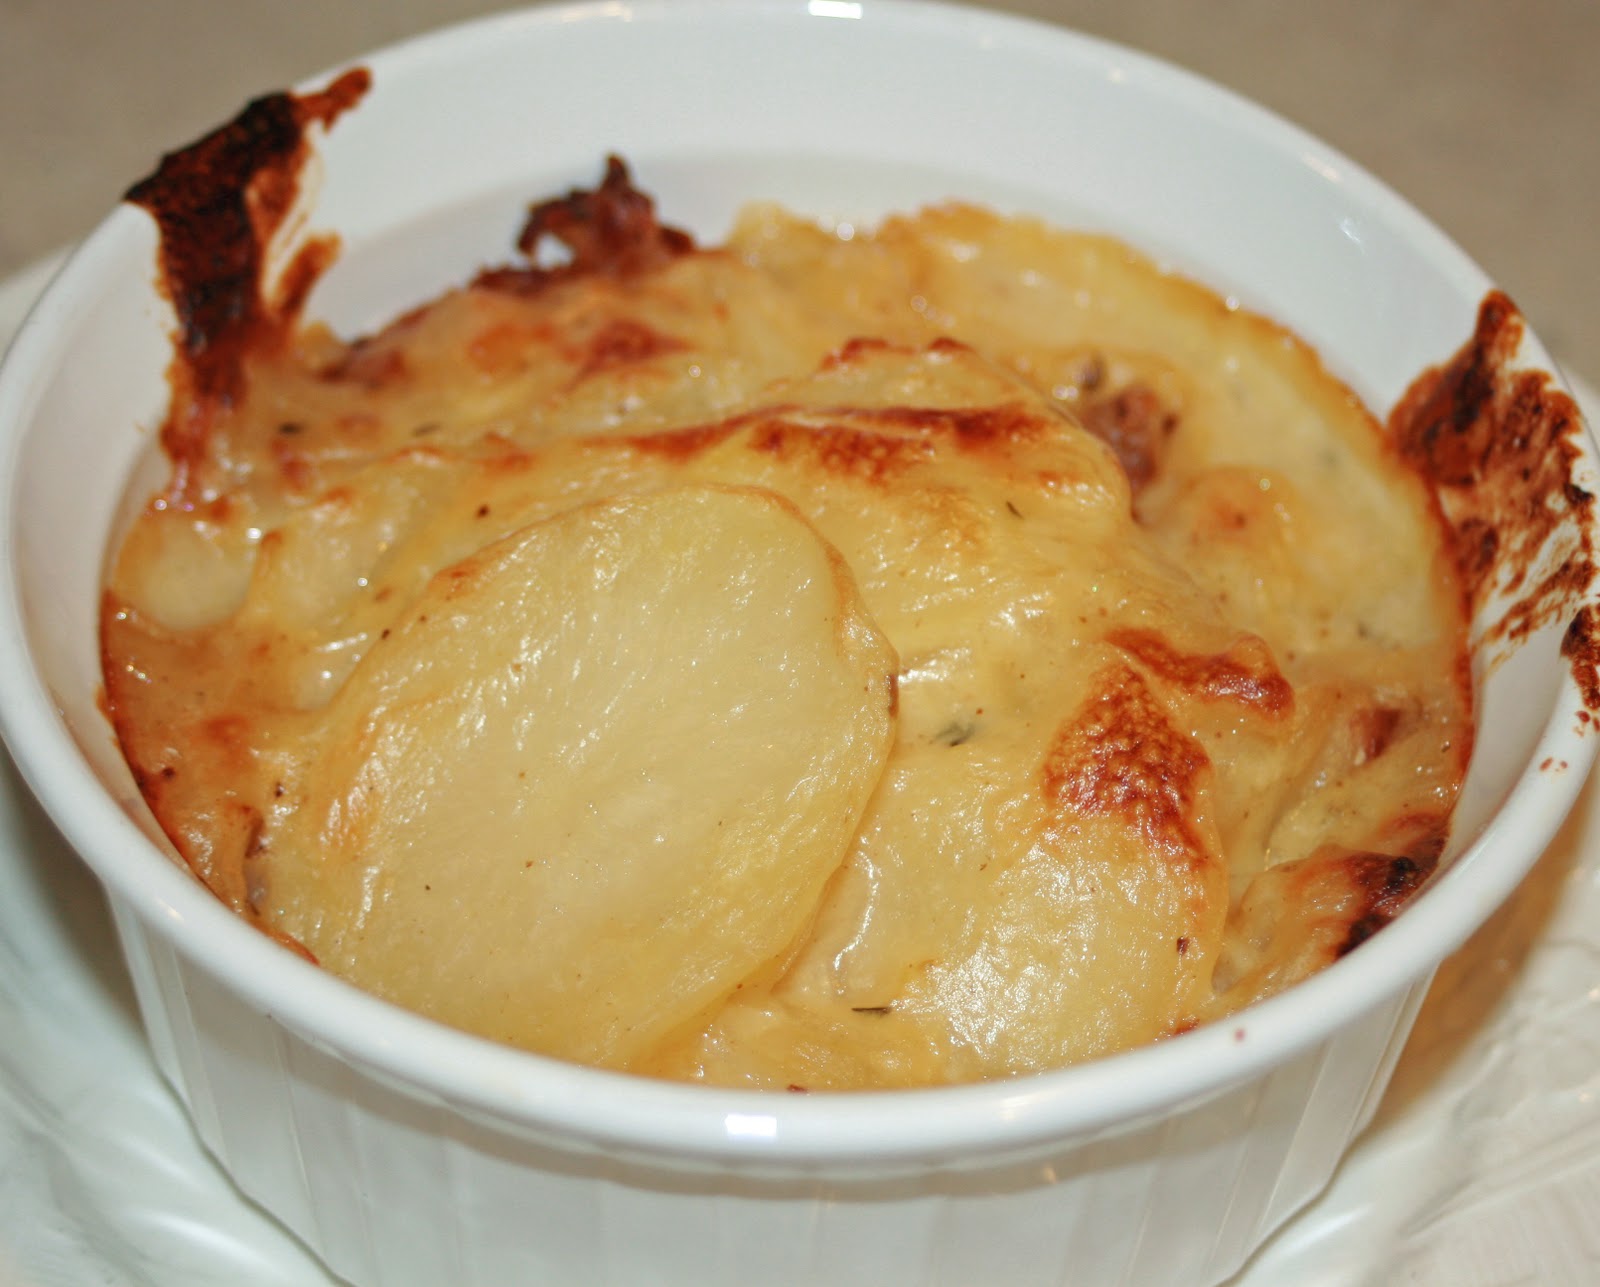
Smoky
Scalloped Potatoes
(Cook's
Illustrated)
 Move over, mashed potatoes—we love this recipe for an alternative
holiday potato side dish. Buttermilk and smoked Gouda give this casserole its
rich flavor and creamy consistency, so we don’t recommend substituting these
ingredients. Here’s what else we discovered:
Move over, mashed potatoes—we love this recipe for an alternative
holiday potato side dish. Buttermilk and smoked Gouda give this casserole its
rich flavor and creamy consistency, so we don’t recommend substituting these
ingredients. Here’s what else we discovered:
* Adding a pinch of baking soda to the potatoes as they cook helps
to tenderize them without leaving any residual taste.
* This dish can be made ahead of time and refrigerated for up to
24 hours.
Serves 8 or more
4 tablespoons unsalted butter*
1 large onion, minced
4 garlic cloves, minced (Cook's Illustrated)
4 teaspoons dry mustard
1 tablespoons minced fresh thyme leaves
2 1/2 teaspoons salt
1/2 teaspoon cayenne pepper
5 pounds russet potatoes, peeled and sliced thin**
1 1/2 cups heavy cream
1 1/2 cups buttermilk
1/4 teaspoon baking soda
2 cups shredded smoked Gouda cheese
1. Adjust oven rack to middle position and heat oven to 425
degrees. Melt butter in Dutch oven over medium-high heat. Add onion and cook
until softened, about 5 minutes. Add garlic, mustard, thyme, salt, and cayenne
and cook until fragrant, about 30 seconds. Stir in potatoes, cream, buttermilk,
and baking soda and bring to simmer. Reduce heat to medium-low, cover, and cook
until potatoes are almost tender, about 15 minutes. Stir in cheese and transfer
mixture to 13 by 9-inch baking dish.
2. Bake until cream is bubbling around edges and top is golden
brown, about 15 minutes. Cool 10 minutes before serving.
 Make
Ahead: The casserole can be prepared through step 1 and refrigerated for up to
24 hours. When ready to bake, cover with foil and bake in 400-degree oven until
hot and bubbly, about 40 minutes. Remove foil and continue cooking until top is
golden brown, about 30 minutes.
Make
Ahead: The casserole can be prepared through step 1 and refrigerated for up to
24 hours. When ready to bake, cover with foil and bake in 400-degree oven until
hot and bubbly, about 40 minutes. Remove foil and continue cooking until top is
golden brown, about 30 minutes.
* I always have unsalted on hand, but with all
my holiday cooking, I ran out. I made it with salted butter and it came
out just fine. But if you have the unsalted on hand, I'd use that.
Tofurky
 We
also make a Tofurky roast each year, as we have some vegetarians in the
family. We've found that one roast can be cut in half (as soon as
you buy it at the store). Cook up half hte loaf for Thanksgiving, and
the other half for Christmas.
We
also make a Tofurky roast each year, as we have some vegetarians in the
family. We've found that one roast can be cut in half (as soon as
you buy it at the store). Cook up half hte loaf for Thanksgiving, and
the other half for Christmas.

 I'm not sure when I first heard about this product, but it was on my mind for some time.
  rum that had me searching for a solution. But I had a feeling these silicone discs had potential. Mainly I was hoping they would be able to act as a secure lid for my stainless steel bowls (or any bowls missing lids for that matter).
 drain cover for the sink.


